Fixing Common Wall Cracks Without Repainting the Entire Room: Simple DIY Tips
Wall cracks are one of those small home problems that can make a room look older, neglected, or poorly maintained, even when the rest of the space is clean and well decorated. The good news is that most common wall cracks do not require repainting the entire room. With the right materials, careful patching, and smart paint blending, you can repair many small cracks so they look neat and natural without turning the project into a full-room makeover.
Whether the crack is caused by normal house settling, minor temperature changes, drywall movement, or small surface damage, a simple repair can often restore the wall’s appearance. The key is to understand what type of crack you are dealing with, prepare the surface properly, and use the right finishing technique so the repaired area blends with the surrounding wall.
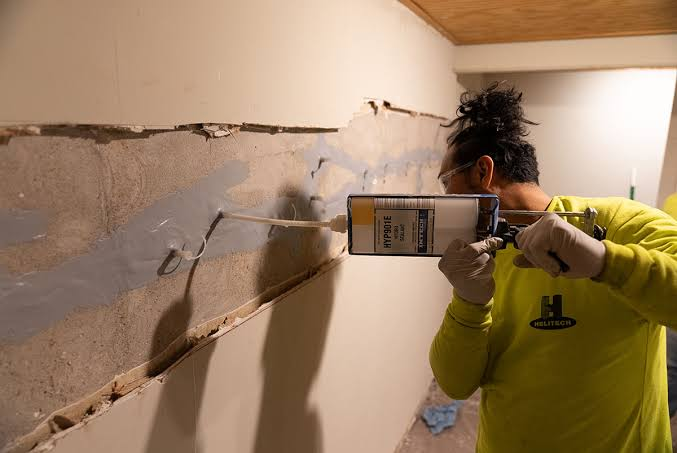
Before starting, it is important to know that not every crack is only cosmetic. Thin hairline cracks and small drywall cracks are usually manageable as DIY repairs. However, large cracks, cracks that keep widening, cracks near doors and windows, stair-step cracks in masonry, bulging walls, water stains, or cracks accompanied by sticking doors may suggest a structural or moisture problem. In those cases, it is better to get professional advice before covering the damage.
Why Wall Cracks Appear
Wall cracks can happen for many reasons, and not all of them are serious. In many homes, small cracks appear naturally over time. Buildings expand and contract with temperature changes. Drywall joints may shift slightly. Paint layers can dry, shrink, or separate. Even everyday vibrations, humidity changes, and seasonal movement can create small imperfections.
One of the most common reasons for wall cracks is normal settling. As a house ages, tiny shifts can occur in the framing and foundation. These shifts may create fine cracks, especially near corners, ceilings, windows, and doors. Another common cause is poor drywall installation. If drywall seams were not taped or mudded properly, cracks may appear along the joint lines.
Moisture can also cause cracks. When walls absorb moisture, the surface may swell, soften, or bubble. As it dries, cracking can occur. This type of crack should not be patched until the source of moisture is fixed. Otherwise, the repair may fail quickly.
Paint-related cracks are also common. Old paint can become brittle and develop fine lines. Thick paint layers, poor surface preparation, or painting over dirty or glossy surfaces can lead to cracking or flaking. These are usually surface-level problems and can often be corrected without repainting the whole room.
Check the Crack Before Repairing It
Before you grab filler and a putty knife, take a few minutes to inspect the crack. This step helps you choose the right repair method and avoid wasting time on a patch that will not last.
Start by looking at the size of the crack. A hairline crack is usually very thin and shallow. These cracks often need only a light application of spackling compound or flexible filler. A wider crack may need mesh tape, joint compound, or more careful layering.
Next, check whether the wall surface around the crack is loose. Gently press near the damaged area. If the wall feels soft, crumbly, damp, or swollen, there may be a deeper problem. Do not simply patch over damaged drywall or plaster without addressing the cause.
Also notice where the crack is located. Cracks near windows, doors, and ceiling corners are common because those areas experience more movement. A single thin crack in these locations is usually not alarming. However, if you see repeated cracks, diagonal cracks, or cracks that continue to grow, take them seriously.
Finally, check your paint finish. Matching a flat or matte wall is usually easier than matching satin, semi-gloss, or glossy paint. Shiny finishes reflect light more noticeably, so even a small touch-up can stand out. Knowing this ahead of time helps you choose a better blending method.
Tools and Materials You May Need
For most small wall crack repairs, you only need a few basic tools. A putty knife, sanding sponge, utility knife, cleaning cloth, spackling compound, joint compound, painter’s tape, primer, and touch-up paint are often enough. For larger or recurring cracks, you may also need self-adhesive mesh tape or paper drywall tape.
A small artist brush or foam brush can help with careful paint touch-ups. A mini roller is useful if the surrounding wall has a rolled texture. Matching the application method is one of the biggest secrets to hiding the repair. If the wall was originally painted with a roller, touching up with only a brush may leave visible brush marks. If the wall has a smooth finish, a light brush application may work better.
You should also keep a damp cloth nearby for cleaning mistakes quickly. Good lighting is helpful too. Natural daylight or a bright lamp will show whether the patch is smooth and whether the color blends well.
Clean the Area First
A clean surface makes a big difference. Dust, grease, loose paint, and wall residue can prevent filler and paint from bonding properly. Use a dry cloth or soft brush to remove dust from the crack. If the area is slightly dirty, wipe it with a damp cloth and let it dry completely.
Avoid soaking the wall. Too much water can soften drywall paper or create new problems. If the crack is in a kitchen, hallway, or children’s room, there may be invisible grime on the wall. In that case, use a mild soap solution, then wipe again with clean water and allow the area to dry.
If there is loose paint or raised edges around the crack, gently scrape them away with a putty knife or utility knife. Do not dig aggressively into the wall. The goal is only to remove unstable material so the repair has a solid base.
Open the Crack Slightly for Better Filling
For very fine cracks, filler may sit only on the surface and fail to grip well. A helpful trick is to lightly open the crack using the tip of a utility knife or the corner of a putty knife. This does not mean making the damage bigger unnecessarily. It simply means creating a tiny V-shaped groove so the filler can settle into the crack instead of just covering the top.
Work carefully and slowly. Remove any dust afterward with a dry brush or cloth. This step improves adhesion and helps prevent the crack from reappearing quickly.
Fill Hairline Cracks
For hairline cracks, lightweight spackling compound is usually enough. Apply a small amount with a putty knife and press it into the crack. Scrape away excess compound so the repair is as flat as possible. It is better to apply two thin coats than one thick coat. Thick filler can shrink, crack, or create a raised patch that is harder to hide.
Let the compound dry according to the product instructions. Drying time depends on the depth of the crack, humidity, and product type. Once dry, lightly sand the area with a fine-grit sanding sponge. The repaired area should feel smooth when you run your hand over it.
Do not over-sand. Sanding too much can expose drywall paper or create a wider dull patch on the wall. The goal is a smooth transition between the repair and the original wall.
Repair Wider Cracks with Tape
If the crack is wider, deeper, or located along a drywall seam, filler alone may not be enough. In that case, use drywall tape for reinforcement. Self-adhesive mesh tape is simple for beginners, while paper tape can create a smoother finish when applied correctly.
Place the tape over the crack, then apply a thin layer of joint compound over it. Use a wider putty knife to feather the edges outward. Feathering means spreading the compound thinner as it moves away from the crack, creating a gradual blend instead of a hard ridge.
Let the first coat dry, then apply a second thin coat that extends slightly wider than the first. For the smoothest result, a third skim coat may be needed. Each layer should be thin. Once dry, sand lightly until the patch blends with the wall surface.
This process takes more time than filling a hairline crack, but it is much more durable for cracks that need support.
Match the Wall Texture
One reason wall repairs stand out is not the paint color but the texture. Even if the color matches perfectly, a smooth patch on a slightly textured wall will catch the light differently. Before painting, compare the repaired spot with the surrounding area.
If your wall is smooth, sanding carefully may be enough. If your wall has a light roller texture, use a mini roller when applying primer and paint. This helps recreate the same surface pattern. If your wall has orange peel, knockdown, or another spray texture, you may need a small texture repair product. Practice on cardboard first so you can match the pattern before applying it to the wall.
For very subtle texture, dabbing with a sponge or stippling lightly with a brush may help. The goal is not perfection under a magnifying glass. The goal is to make the repair invisible during normal use of the room.
Prime Only the Repaired Spot
Primer is important because filler and joint compound absorb paint differently than the surrounding painted wall. If you apply touch-up paint directly over raw filler, the repaired area may look dull, patchy, or lighter than the rest of the wall.
Use a small brush or mini roller to apply primer only over the repaired area. Feather the primer slightly beyond the patch, but do not spread it too far. Let it dry completely. For small repairs, one coat of primer is usually enough.
Choose a primer suitable for your wall and paint type. A basic drywall primer works well for most interior repairs. If there was a stain, water mark, or discoloration, use a stain-blocking primer before painting.
Use the Original Paint If Available
The easiest way to avoid repainting the entire room is to use the original wall paint. If you have leftover paint stored from the last paint job, check whether it is still usable. Open the can and stir it thoroughly. Paint can separate over time, so mixing is essential.
Before applying it to the wall, test a small amount in an inconspicuous spot. Paint color can change slightly as it dries, and old paint may not match perfectly if the wall paint has faded from sunlight or age.
If you do not have leftover paint, take a paint chip or sample to a paint store for color matching. You can often remove a small chip from behind a switch plate, outlet cover, or hidden corner. The better the sample, the better the match.
Touch Up Paint the Right Way
Touch-up painting is where many small repairs become noticeable. The trick is to use as little paint as possible and blend the edges.
Start by applying paint only to the repaired area. Use the same tool that was likely used on the wall originally. If the wall was rolled, use a small roller. If the area is tiny, a small brush may work, but lightly feather the edges.
Do not load the brush or roller with too much paint. Heavy paint creates a raised spot and can look darker or shinier. Apply a thin coat and let it dry fully before judging the color. Wet paint often looks different from dry paint.
For better blending, use a feathering technique. After covering the patch, lightly spread the paint outward with less pressure so the edge becomes soft and gradual. Avoid creating a hard square or circle of fresh paint.
Sometimes one coat is enough. Other times, a second thin coat is needed. Give the first coat time to dry before applying more. Rushing can make the finish uneven.
Blend Instead of Repainting the Entire Room
If the touched-up area still stands out slightly, you may not need to repaint the entire room. Instead, repaint only a larger natural section of the wall. For example, paint from one corner to another, or from the baseboard to a doorway edge. Natural breaks help hide slight color differences.
Another option is to blend within a small area using a dry roller technique. After applying paint to the repair, roll outward lightly with a nearly dry roller. This spreads the paint thinly and helps it fade into the existing wall.
Lighting matters too. A patch that looks obvious under direct work light may be much less visible in normal room lighting. Check the repair at different times of day before deciding that more painting is needed.
Common Mistakes to Avoid
One common mistake is skipping primer. Even if the paint color is correct, unprimed filler can absorb paint unevenly and create a dull patch. Another mistake is applying too much filler. A thick mound of spackle is harder to sand and more likely to show.
Many people also sand too aggressively. This can damage the wall surface around the repair and make the patch larger than necessary. Light sanding is usually enough.
Using the wrong paint sheen is another problem. A flat paint touch-up on a satin wall, or satin paint on a flat wall, will be noticeable even if the color is close. Always match both color and sheen.
Painting a perfect square or circle around the crack can also make the repair obvious. Feathering is better because it softens the transition between old and new paint.
When You Should Not Hide a Crack
Some cracks should not be treated as simple cosmetic issues. If a crack is wider than a small surface crack, continues to expand, appears suddenly, or runs diagonally from a window or door frame, it may need professional evaluation. Cracks accompanied by dampness, mold, bubbling paint, or soft drywall should also be checked carefully.
If you patch over a moisture problem, the crack may return, and the wall may continue to deteriorate. Fix leaks, condensation issues, or ventilation problems before making cosmetic repairs.
Older homes may also contain lead-based paint or other materials that require caution. If your home was built before modern paint safety standards, avoid sanding old painted surfaces without proper testing and protection.
Simple Maintenance Tips After Repair
After repairing wall cracks, keep an eye on the area for a few weeks. If the crack does not return, the repair was likely successful. If it comes back quickly, the wall may be moving, the joint may need stronger reinforcement, or there may be an underlying issue.
Maintain consistent indoor humidity when possible. Very dry or very humid conditions can contribute to wall movement and paint problems. Good ventilation in bathrooms, kitchens, and laundry areas can also reduce moisture-related cracks.
Keep leftover paint properly sealed and labeled. Write the room name, paint color, brand, finish, and date on the can. Store it in a temperature-stable area. This makes future touch-ups much easier.
FAQs
Can I fix wall cracks without repainting the whole room?
Yes, many small wall cracks can be repaired without repainting the entire room. The key is to fill the crack properly, sand it smooth, prime the repaired area, and use matching touch-up paint. Blending the paint carefully helps the repair disappear into the surrounding wall.
Why does my touch-up paint look different from the wall?
Touch-up paint can look different because of fading, paint age, different sheen, poor mixing, or a change in texture. Even paint from the original can may not match perfectly if the wall has been exposed to sunlight, dust, or cleaning over time. Always stir paint well and test it before applying it to a visible area.
Do I need primer for a small wall crack repair?
Yes, primer is recommended. Spackle and joint compound absorb paint differently than a previously painted wall. Without primer, the repaired area may look dull, patchy, or uneven. A small amount of primer over the patch can make the final paint blend much better.
What is the best filler for hairline cracks?
Lightweight spackling compound is usually a good choice for hairline cracks in drywall. For cracks that may experience slight movement, a flexible paintable filler may work better. Wider cracks or cracks along drywall seams may need joint compound and drywall tape.
How do I stop a wall crack from coming back?
To reduce the chance of a crack returning, clean and prepare the area properly, open the crack slightly, use the correct filler, and reinforce wider cracks with tape. If the crack is caused by structural movement or moisture, it will likely return unless the underlying problem is fixed.
Can I use caulk for wall cracks?
Paintable caulk can be useful for cracks in corners, along trim, or where two surfaces meet and slight movement is expected. However, caulk is not always the best choice for flat wall cracks because it can be harder to sand smooth. For flat drywall surfaces, spackle or joint compound usually gives a cleaner finish.
How long should I wait before painting over filler?
Drying time depends on the product and the depth of the repair. Some lightweight spackles dry quickly, while joint compound may take several hours or longer. Always follow the manufacturer’s instructions. The patch should be fully dry before sanding, priming, or painting.
What if I do not have the original paint?
If you do not have the original paint, take a small paint sample to a paint store for matching. A sample from behind an outlet cover or switch plate can work well. Be sure to match both the color and the sheen, such as matte, eggshell, satin, or semi-gloss.
Should I use a brush or roller for touch-ups?
Use the same type of tool that was used on the wall originally. If the wall was rolled, a mini roller usually blends better. If the repair is very small, a brush can work, but feather the edges carefully to avoid visible brush marks.
When should I call a professional?
Call a professional if the crack is large, growing, diagonal, located near structural areas, or accompanied by water damage, mold, bulging walls, or doors and windows that no longer close properly. These signs may point to a deeper issue that should not be covered with a simple patch.
Final Thoughts
Fixing common wall cracks without repainting the entire room is completely possible when the damage is minor and the repair is done carefully. The most important steps are proper inspection, cleaning, filling, sanding, priming, and blending. A rushed patch often stands out, but a patient repair can make a crack nearly invisible.
The secret is to think beyond simply covering the crack. You need to match the wall’s texture, paint color, sheen, and application method. Small details, such as using a mini roller instead of a brush or applying primer before touch-up paint, can make a major difference in the final result.
While cosmetic cracks are usually easy to handle, do not ignore warning signs. If a crack keeps returning, grows wider, or appears with moisture or structural symptoms, it is better to solve the cause before repairing the surface. For everyday hairline cracks and small drywall imperfections, however, a simple DIY repair can refresh your wall without the time, cost, and hassle of repainting the whole room.